Flettner Fl 282 Kolibri
| Manufacturer: | Kit: | Quality: |
| Huma | Flettner Fl 282 Kolibri | |
|
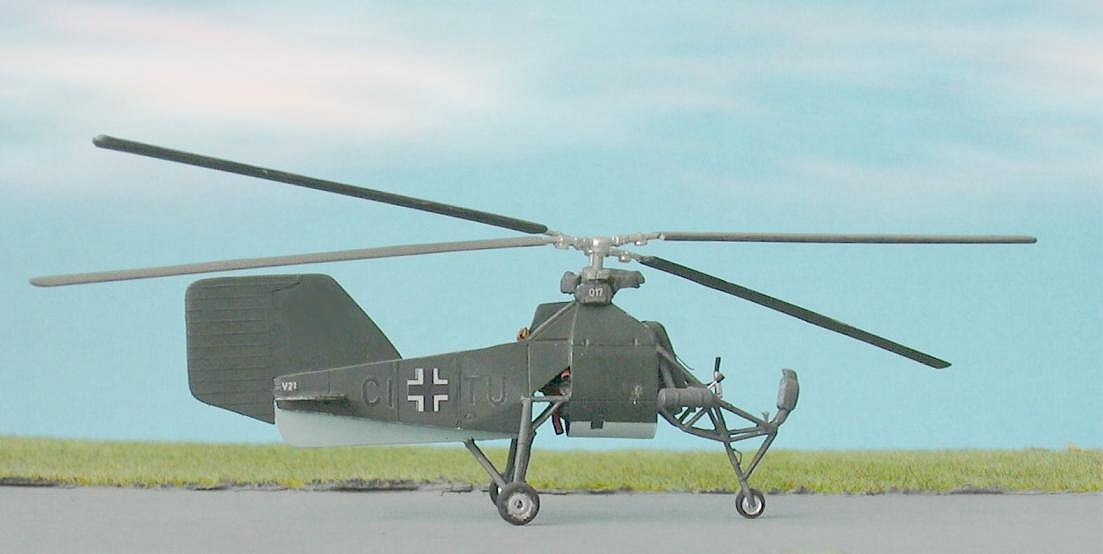
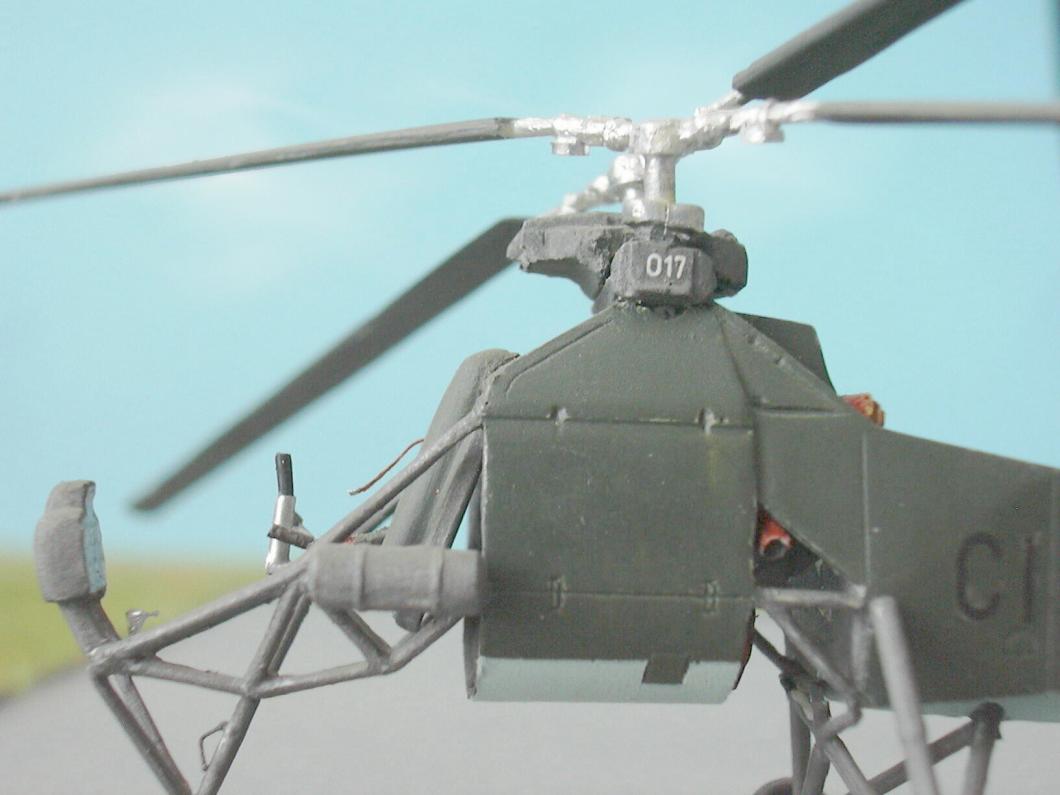
Ein reichlich seltsamer Vogel, der auch im Wk 2 im Einsatz war, war der Flettner Fl 282 Kolibri. Dieser Hubschrauber, von dem gerade mal 24 Stück gebaut wurden, mußte sich auf einem Kreuzer in der Ostsee der Prüfung auf Truppentauglichkeit stellen, und erlebte im östlichen Mittelmeer bei der Geleitzugüberwachung seine Feuertaufe. Um die Fl 282 zu verbessern, waren folgende Arbeiten nötig: Das Leitwerk wurde komplett ausgetauscht, da die Bausatzteile viel zu dick waren. Ich habe es aus Plastikplatten neu, dünn aufgebaut. Beim Zusammenbau der Rotorwellen muß man darauf achten, daß die Rotorblätter im richtigen Winkel zueinander stehen, nur dann kämmen sie so ineinander, daß sie sich beim Drehen nicht berühren. Das sogenannte Cockpit ist sehr einfach zu bauen, für die Instrumente steht ein Abziehbild zur Verfügung. Ich habe noch am Pilotensitz Gurte ergänzt, ebenso beim hinteren Abteil und auch dessen Plane aus Papier gemacht. Es ist schade, daß von dem ziemlich schönen Sternmotor im Inneren nichts zu sehen ist. Die Farbgebung beschränkte sich auf Dunkelgrün und Hellblau, die Kennung lag dem Bausatz bei. |
A rather courious bird, having been used in WW 2, was the Flettner Fl 282 Kolibri. This helicopter, of which had just been produced only a 24 specimen, had to approve service trials on a cruiser in the Baltic Sea, and recieved its baptism of fire when watching convoys in the Eastern Mediterranean. To optimize the Fl 282, following works were necessary: I replaced the complete fin by a thin selfmade one of plastic-sheet, because the kit's parts were much to thick. When building the two single axles of the rotors, you have to take care of the correct angle of the rotor-blades; only if that angle is correct, the rotor-blades will cog into each other and allow their proper function. The so-called cokcpit can be built very easily and there is a decal added to the kit for the instrument-panel. I still added harnesses to the pilot's seat, also to the rearward compartment and that compartment's cover is self-made of simple paper. It's really a pity, that there is nothing more to see of the well moulded radial engine inside. The camouflage in dark green and light blue was easily done, the markings were added to the kit. |
Further picture